Monday, 27 October 2008

Chivda

I can not think of any other festival other than Diwali, where the spotlight is on the food. Agreed that it is supposed to be 'Festival of lights', after all the literal translation of Deepavali is 'A line of lights'. But still food has become the most important part of this festival too, as with so many others.

The preparations (read cooking!) start well in advance, sometimes with weeks still to go. The list of items made is endless if one has the time, energy & enthusiasm for it. In fact 'Faral' as these food items are collectively called, are sometimes the only dishes consumed during the odd 4-5 days. Faral for breakfast, Faral with lunch, Faral for evening snacks with Tea/Coffee, Faral again with whatevers made for Dinner. Atleast this was what was followed at my place.

Some of the main constituents of this Faral are

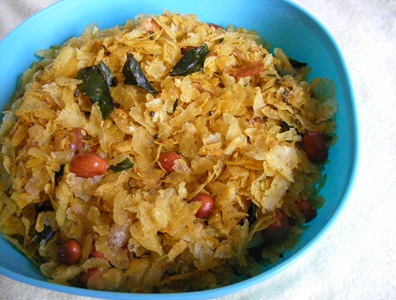
  • Chivda, made mainly from Patal Pohe (Thin beaten rice) & may sometimes also contain murmura (puffed rice).
  • Chakali
  • Sev
  • Ladoo, various types such as Besan(chickpea flour), Rava(Semolina), Rava-Besan, Nariyal(coconut) etc
  • Shankar Pale both sweet & savoury
  • Karanji
  • Chirote
  • Anarasa

What I have listed out here are some of the traditional Faral items. Other items such as Burfi, Gulab Jamun, Rasgulla, Halwa and anything else you can think of are additions based on individual taste.

Personally I like the savoury snacks better than the sweet ones. Give me Chakali anytime & I will happily munch away, but I have to be 'in the mood for sweets' if you offer me a Besan Ladoo!

I make Chivda very often to keep a snack handy, better than gorging on those potato wedges, crisps, fries etc. Since these items are readily available & its quite natural & easy to choose them whenever one feels like having a just a little something. So to avoid that I make Chivda & store it for such evenings. It even serves us as a breakfast item sometimes along with a dollop of curd which compliments the crunchy chivda very well.

Ingredients

  • 250 gm Thin Beaten Rice (Patal Pohe)
  • 3 tblsp oil
  • 2 tsp mustard seeds
  • 2 tsp Cumin seeds
  • 12-15 curry leaves
  • 1 tsp Hing (Asafoetida)
  • 2 tsp Haldi (Turmeric powder)
  • 2-3 tsp red chili powder
  • 1-2 tblsp coarsely ground coriander seeds
  • 1/2 cup peanuts and/or Dalia (roasted split chickpea)
  • 1-2 tsp sugar
  • salt to taste

Method:

Heat the oil in a large Kadai. Its very important to use a large kadai/ deep pan since you will need space to turn over the pohe from time to time.

Once the oil is hot, splutter the mustard & cumin seeds. Add the curry leaves & peanuts and fry for sometime.

Add the Hing, Haldi, red chili powder  & ground coriander. If you dont have coriander seeds, you can use Coriander powder instead.

Mix everything properly on low flame, taking care not to let the masalas burn. Add the salt & mix well.

Add the Patal Pohe and mix till the Pohe are properly coated. Add in the sugar and mix. Check for salt & add some more if needed.

Continue to heat on low flame for approx 15-20 min and keep turning the pohe to roast them properly. This part has to be done very patiently. If you keep the flame high to finish it off quickly, you will get some burnt pohe & the rest will remain as they are. The key is to keep turning them every 3-4 min and do this on low flame.

To speed up things or rather to avoid standing & staring at the pohe as they get crunchy, pre heat the oven to 200 deg C. Rub the pohe with 2 tsp of oil and roast in the oven for about 8-10 min. Keep checking in between. Take them out once they are crunchy and proceed normally. Once the pohe are coated well with oil & masala from the phodni, the work is done, since they are already crunchy!

I have tried this & it really works but I still prefer the stove top method.

Turn off the flame and spread the chivda to cool.

20Aug08 309

Once cool, store in air tight containers. You can mix some baarik (thin) sev with the Chivda. Red Chili powder can be replaced with chopped green chillies, if you opt for that, add them along with the curry leaves and fry them too.

Chivda can be stored for as long as 3-4 weeks if stored properly in dry air tight containers.

You can also try making  Mysore Pak from this blog, this Diwali!

Wishing everyone a very Happy Diwali!
Thursday, 23 October 2008

Fried Rice with Baby Corn Manchurian

My association with Chinese food, or rather what is popularly called the Indo-Chinese food can be best described by saying that I absolutely can not survive without it. And the one time that I was forced to live without it, was like a nightmare for me to say the least. But more about it later.

Authentic Chinese is no where close to what we get in Indian restaurants under the name of Chinese cuisine. The real Chinese food is a lot less spicier and even most of the vegetables etc used in the Indian restaurants never feature in Chinese food, examples being Cauliflower, Paneer (Cottage Cheese) etc. You even get to see peas, Jeera (Cumin seeds), Coriander leaves, Curry leaves etc in some of the restaurants! While I don't want to have curry leaves in my chinese food (!) I also don't prefer the actual blander version of chinese food.

Chinese food also features prominently in my memories whenever I think of my college days & my close friends, my best friend SS in particular. Both of us were crazily into Chinese food. We didn't have to think at all when placing an order in any restaurant. It would invariably be Chinese. Even after passing out of college whenever we met after work, most of the time it used to be Chinese for us.

But all this was put on hold when I developed an allergy to Chinese food, it might have been the soy sauce or one of the other ingredients actually. I never found out what it was but whenever I ate chinese food, I would get nauseated and spend that & the next day vomiting my lungs out! This proved be a very difficult time for both of us. I couldn't have chinese even though I wanted to and because of this even SS couldn't have it. We would reluctantly settle on Pav Bhaji and miss the Hakka Noodles & Manchurian terribly.

The day I discovered that my allergy was gone was one of the happiest days of my life. SS always asked me to see if the allergy was gone. 'If you wont try, how will you know', she would say. But I always put it off, thinking about the bad time I would have. But that day the craving was so bad that I decided to take a chance and was glad that I did!

As with so many other things, I miss the Indian style Chinese food here in London, and have to make it at home if we want it. Only recently I have discovered that 'Tulsi' restaurant in Wembley serves 'authentic' 'Indian style Chinese' ! Their Hakka Noodles is a must try!

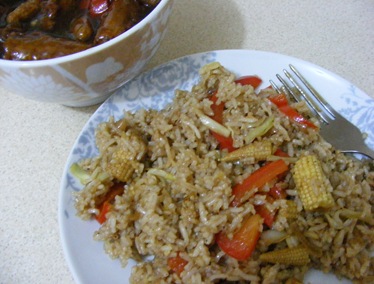
Veg Fried Rice

5Aug08 097
Serves 2

Ingredients

2 cups rice, preferably the Basmati variety
2 tsps Garlic, chopped finely or minced
1 tsp Ginger, finely chopped
2 Green Chillies, slit (Optional)
2 tblsp Soy Sauce
1 tblsp White Vinegar
2 Cups sliced/shredded Vegetables (Capsicum, Carrot, Cabbage)
2 tblsp Oil
Salt
Pepper Powder
Method:

Cook the rice such that the grains are separated. To do this, I add a little less water than usual and 2 drops of oil while I pressure cook it. Once cooked, spread out the rice to cool down.

In a wok, heat the oil and fry the ginger & garlic. Add the Green Chillies and saute.

Throw in the vegetables and saute on high flame. I some times add Baby corn to the rice as well.

Add the soy sauce, vinegar, salt and pepper and mix thoroughly. Now add the cooked rice and keep mixing on high heat. Adjust the seasoning and serve hot, with Baby Corn Manchurian.

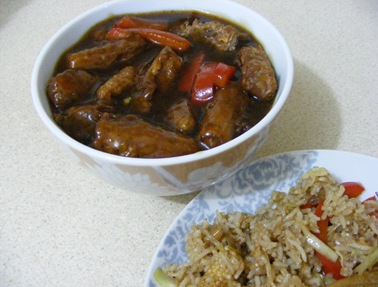
Baby Corn Manchurian

5Aug08 099

Serves 2

Ingredients

For the dumplings

  • 8-10 Baby Corns, cut into bite size pieces
  • 4 tblsp Maida (Plain Flour)
  • 2 tblsp Cornflour
  • 1/2 tsp Ginger paste
  • 1/2 tsp Garlic paste
  • 1 tsp Soy Sauce

For the gravy

  • 1/2 cup Sliced vegetables such as spring onion, capsicum (optional)
  • 2 tsp minced Garlic
  • 2 tsp grated ginger
  • 2 tblsp Soy Sauce
  • 1 tblsp White Vinegar
  • 2/3 tblsp Cornflour
  • salt
  • Pepper


Oil for frying and for the gravy

Method:

Prepare a thick batter with the Maida, corn flour, ginger & garlic pastes, Soy sauce, salt, pepper powder and water.

Heat oil in kadai. Dip the baby corn pieces into the prepared batter and fry till crisp. Remove on kitchen towel and reserve.

Heat 1 tblsp oil in a wok. Add the ginger and garlic and fry for half a minute. Add the sliced vegetables if using and saute on high flame. Add the soy sauce & vinegar and cook on high flame.

Add 1/2 cup of water, salt & pepper and bring to boil. Dissolve 2/3 tblsp of corn flour in a little cold water and add this to the Manchurian.

Heat while continuously stirring as the gravy thickens. Cook till it reaches the desired consistency and then add the fried Baby Corn. Mix properly and switch off the heat. Garnish with Spring Onion greens and serve hot.

To make this into a dry Manchurian, reduce the quantity of water to around 2-3 tblsp and the corn flour to just 1 tblsp.

Wednesday, 15 October 2008

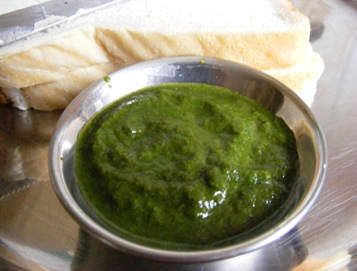
The Versatile Green Chutney

Versatile because it can be used in so many different ways. It can be served as an accompaniment with savoury items such as Bhajiyas, Samosas, Wadas, Fries and so on. It is a must when making Chaat items such as Sev Puri, Dahi Bata Puri etc. The Sandwiches sold on the streets of Bombay, which otherwise have the same basic ingredients, are made famous by this very Chutney, adding that special touch to the bread slices.

It is also versatile because, keeping the basic ingredients intact, one can play around with the ingredients, adding some or even changing  the quantity of each item depending on personal preferences. But Coriander remains the basic central ingredient.

Although the classic name for this is Dhaniya Pudine ki chutney (Coriander-Mint Chutney), I even skip the Pudina (Mint) sometimes but the chutney turns out to be delicious all the same. This time I had almost all the classic ingredients with me.

I have recently started to put the huge freezer (bigger than the refrigerator itself!) to good use. I make this chutney in bulk whenever I lay my hands on a fresh bunch of Dhaniya & Mint and then freeze it small quantities (each equal to the amount I use for a single time). Whenever I need the chutney, I just take out one of the small containers and thaw it in the fridge overnight. Another reason for making this in bulk is the same old problem of my Mixer, which is not all suitable for grinding in small quantities!

Dhaniya Pudine ki Chutney

DSCF8822

Ingredients

  • 2 cups fresh Coriander leaves
  • 1/4 cup Mint leaves
  • 2-3 cloves of Garlic
  • 2" piece of Ginger
  • 5-6 Green Chillies
  • 1/4 cup grated coconut (Optional)
  • 2 tblsp Lime Juice
  • 1/2 tsp Sugar
  • Salt

Method:

Combine all the ingredients and grind them using a little water as required.

The grated coconut is optional but it gives volume to the chutney and also enhances the taste. I sometimes use ground Dalia (roasted split chickpea) in place of the coconut and it serves the same purpose while changing the taste a bit.

The number of green chillies can be adjusted depending on the spice level you are comfortable with.

DSCF8827

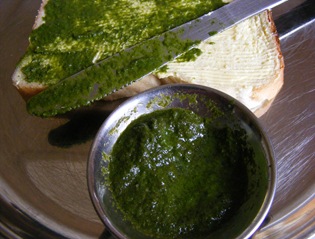
The simplest ay to enjoy this chutney is to make a Chutney Sandwich. Take two slices of bread and apply butter on both. Spread the chutney on one slice and a little Tomato ketchup on the other. Place one slice on the other face down and take a bite!

This Chutney will reach Siri's Corner just in time for this month's Herb Mania - Coriander. Herb Mania is an event started by Dee of Ammalu's Kitchen.

Thursday, 9 October 2008

Naivedya Series: Kadabu

On the occasion of Dasara, I am continuing with the Naivedya series with yet another Chana Dal (Split chickpea) based sweet dish called Kadabu in kannada. Lookswise Kadabu is similar to the famous Karanji but made with whole wheat flour as opposed to Maida (Plain flour) and the filling is also different.

In kannada, specifically in the North Karnataka region, Kadabu is also used as a slang for a beating! A story associated with this comes to mind.

A man once gets to taste Kadabu for the first time at a friends place and likes it very much. He comes back home & tells his wife about it but forgets the name of the dish.

After a few days, he feels like eating them and asks his wife if she can prepare them, but since he hasn't told her the name of the dish, she is not able to understand what to make. he then tries to describe it to her saying that its fried, has a sweet filling and so on. She still doesn't understand anything and keeps asking him about it. They have a huge fight over this and in anger the husband slaps her hard.

Just as all this is happening the lady's father comes home & gets worried on seeing his daughter crying. He goes to her & asks her what the matter is & why her cheeks are puffed up like a Kadabu? The husband jumps at this & finally remembers the name!

We used to laugh at this story every time it was told, which means practically every time we made kadabu at our place :)

These Kadabus are on their way to Srivalli's Cooking for all seasons, who is the host for this month's JFI - Festival Treats.

Also sending this to Sweet Series hosted by Mythreyee of Paajaka Recipes.

Kadabu

Makes about 8-10 Kadabus

Ingredients

  • 1 cup Chana Dal (Split Chick Pea)
  • 3/4 cup grated Jaggery
  • 1/4 cup chopped small pieces of Dry coconut
  • 1/2 tsp Cardamom Powder
  • Dry fruits such as Cashew, Almonds, Walnut, raisins etc (Optional)
  • 2 cups Wheat flour
  • Oil for frying

Method:

Pressure cook the Chana Dal and drain the water. Mash the Dal properly and put to heat in a pan . Add the grated jaggery and mix properly.

Add the grated coconut and Cardamom powder and conitnue to cook till all the water dries out and you get a homogenous mixture. This is called the Puran, the filling. Add the dry fruits if using and mix well.

Prepare a stiff dough with the wheat flour using some water. Make small lemon sized balls and roll out small slightly oblong pooris. Avoid using any flour while rolling out the dough as much as possible. I generally use a drop of oil in place of the flour. This prevents the oil from getting contaminated with burnt flour, while frying.

Place some of the filling in the middle along the length and close the poori to cover it. Seal the edges by pressing them together very tightly. This has to be done properly since we don't want the filling coming out while frying the Kadabu.

Heat oil in a deep kadai and fry the Kadabu over medium slow flame, turning them from time to time, until brown & crisp.

 20Aug08 204

The classic way of serving them is to make a small hole in the middle and fill it up with Ghee/Toop/Tuppa (Clarified Butter), the more the better :) festivals are after all for indulging!

Wishing everyone a very Happy Dasara!