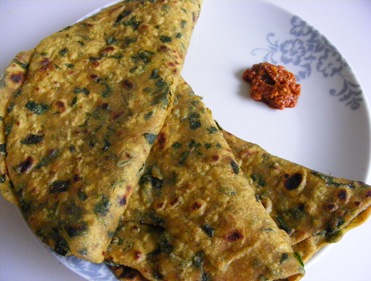
Thanks to Dee's Herb Mania, I now know that Methi (Fenugreek) is a herb and not just a green vegetable! Although I use Kasuri Methi extensively to flavour a lot of dishes, it never struck me that fresh Methi could be a herb. But now I know :)
One of the main reasons for this ignorance could be that, in India we rarely use Methi as a herb. Most of the times it is the main ingredient in the particular dish, for example this Aloo Methi. For me, a herb is something which is used to flavour the dish. In that sense I could never imagine Methi to be a herb.
Another such example is Dill, Shepu in Marathi & Sabbasge in kannada. This is considered to be a herb but prepared as a complete bhaji at home.
The methi paranthas that I make are somewhere in between the actual parantha & a methi thepla. They are not really paranthas because I dont stuff the methi in the dough like some people do but mix the methi leaves while preparing the dough itself as in a thepla. But they are not theplas as well because I dont use any besan (Chickpea flour) in the dough which is a part of a traditional thepla. And the usage of oil is considerably less than that in a thepla.
Makes 6-8 Paranthas
Ingredients
- 2 cups chopped Methi (Fenugreek) Leaves
- 2 cups Wheat flour
- 1/2 tsp Haldi (Turmeric Powder)
- 2 tsp Red Chili powder
- 1 tsp Garam Masala
- Salt
- Oil for cooking
Method:
Mix all the ingredients except oil and make a pliable dough using water. The dough should not be too soft as the Methi will let out water and it will turn soggier after sometime. Leave to rest for about 15-20 min so that the flavour of Methi gets assimilated in the dough.
Divide the dough into 6-8 equal portions. Shape them into balls and then roll out into round paranthas using a little flour to prevent sticking. The parantha should not be too thin & not too thick either.
Heat a Tawa (Griddle) and place the rolled out Parantha. Cook 1-2 min and then turn. Cook again for a minute and then drizzle some oil on the sides and also on the surface of the parantha. Turn it again and repeat.
Cook well till the parantha is properly cooked & looks crisp on both the sides.
Serve with Chhunda, pickle or plain old Tomato ketchup.
This goes to this month's Herb Mania, being hosted by Red Chillies.

Hi First time at your blog. I love methi parathas and your's look really yummy :-)
ReplyDeleteThanks a lot Dershana!
ReplyDelete