Monday 24 November 2008

Breaking the Routine with Pasta

I will be taking a break from blogging for a month, as I am off to India tomorrow. While some of you may be muttering " lucky girl!", some of you may be saying "me too!" and some others " I wish I could go too...", I have mixed feelings about going to India this time. I am wary and apprehensive that this trip will bring back sad memories about a personal tragedy which recently took place, those memories which I have been trying hard to cope with and have pushed them far behind only to come back to me now.

At the same time I am happy & excited about a wedding in the family. Also this is our first trip to India since S has become old enough to understand (not completely, but still...) where she is going. It is going to be fun to see her reaction and understand what she feels about things over there.

I am also feeling bad that I will miss being here in London for Christmas. This would have been my fourth in this city and I remember being excited every year. Waiting eagerly to see if it would be a white Christmas every year, checking out the shops for Christmas deals, gawking at the decorated Christmas trees everywhere you go, setting up the tree at home and so on. In spite of all this, when Christmas actually arrives, it brings along with it a sense of sadness. Its a drastic change from the hustle bustle a day earlier to the quiet lonely streets on the all important day. The town centre wears a deserted look, even the otherwise 24 hrs open Food & Wine shops are closed and you either stock up on essentials such as Milk or be very careful about how you use the only 'Can' you have at home!

But then I think of meeting all my dear ones (family & friends), the delicious food (read street food) I will be gorging on and I really don't mind being away during Christmas. See, I already told you that I have mixed feelings about this!

But enough of my ramblings now, let me come to the food part now. Apart from being one of our favourite fast foods here, Pasta is a great routine breaker for us. Although Indian food is the staple for us, we do try out different cuisines and I try to recreate them at home whenever I can. Pasta, mainly with a Tomato based sauce features very frequently. The first time I made it, I searched high & low for a good recipe and found that a single recipe either did not suit my palette or was not simple enough to make. So I took whatever I liked from each of the recipes and created this one.

The tomato sauce resembles the classic Marinara sauce but is still different. I am not a cheese person, although GM loves it. To accommodate both of us I use very little cheese while cooking the sauce/Pasta and then add it for him.

Pasta in a Tomato Sauce

5Aug08 056

Serves 2

Ingredients

  • 200 gm Pasta (Penne, Fusilli or Farfalle)
  • 4-5 Vine tomatoes, chopped
  • 2-3 cloves garlic, finely chopped
  • 2 tblsp Virgin Olive oil
  • 3-4 tsps Italian dried mixed herbs (Oregano, Thyme, Basil, Sage, Parsley)
  • Salt
  • Crushed Black Pepper
  • 1 cup grated cheeses (Cheddar, Mozzarella or Red Leicester)

Method:

Heat the olive oil in a pan. Add the chopped garlic and fry taking care not to burn it.

Add the tomatoes when the garlicky smell spreads through the kitchen, before the edges of the garlic start to brown.

Cook on medium flame till the tomatoes are soft. Crush the bigger tomato pieces with the back of the spoon and continue to cook till you get a nice saucy texture.

Add the Italian herbs, salt and black pepper. Mix and cook on low heat with a cover for about 5-7 minutes.

Meanwhile in a large pan, put 8-10 cups of water to boil and add salt to it. Once the water starts to boil, add the Pasta and cook for about 6-8 minutes. The pasta has to be cooked al dente..I know that everyone will tell you this, but it really is very important as otherwise you will end up with a soggy heap of broken/disfigured pasta in the sauce. But at the same time it is important to cook the pasta thoroughly. Please refer to the packet instructions for the exact details about the amount of water and the time for which it is to be boiled.

Once done, drain the pasta and mix a little olive oil and keep aside.

Remove the cover for the sauce and add the cooked pasta and mix well to coat the sauce evenly on the Pasta. Cover again and cook for 3-4 minutes.

Now add 1/2 cup grated cheese. Mix and return to fire with the cover on and cook on low heat for 2-3 min until the cheese melts. Sprinkle the remaining cheese and serve.

This last step can also be done in a conventional oven. Mix the cheese with the pasta and transfer to a baking dish. Sprinkle the remaining cheese on top and bake in a pre heated oven at 180 deg until the cheese melts and starts to brown. Remove from the oven and serve hot.

I sometimes add Baby Corn (blanched & added to the sauce before the pasta), Sweet corn (added along with the pasta to the sauce), pickled Jalapenos (added a minute before serving) or grated Parmesan Cheese (sprinkled on the top while serving) depending on the mood for the day.

I leave you with this Pasta recipe now. I will be back after a month. Until then Happy browsing and if there's anything you would like to tell me about this blog, any suggestions, queries, recipe requests etc, please drop me a line by using the 'Contact me' link on the side bar.

Oh..and Merry Christmas, well in advance!!!

Monday 17 November 2008

Jeera Rice with Dal Makhani

DSCF8563 

There are comfort foods and then there are some more.  Dal-Chawal, Varan-Bhaat or Anna-Tavvi, called it by any name, is the all time favourite comfort food, for me too as for so many others. But sometimes the craving is for something richer! Dal Makhani fits the bill perfectly here. And if it is combined with Jeera Rice, even better!

The best part about this combination is that apart from being a comfort food for me, it can also feature on a menu, when guests are expected or on days when we want to have a little more than dal-Chawal!

Dal Makhani, also called Kaali (Black) Dal & Maa ki Dal, is something that I have always been in awe of. The name itself sounded intriguing to me. I was introduced to this Dal, by a Punjabi school friend of mine in Delhi. She called it Maa ki Dal and I was wondering if she meant her 'Maa' (Mother) had made the dal! After hearing it every time, she brought this in the lunch box, I innocently asked her 'Are there so many people at your home who make this Dal, that you have to specify each time...?' Now for me, this was a valid question since I knew she stayed in a joint family. But I myself burst out laughing when she told me what it was. 'Maa'  means whole Udad (Black gram) in Punjabi, which is the main constituent here and hence the name :)


Dal Makhani

DSCF8551

Ingredients

  • 1 cup Kali Urad (Whole blackgram)
  • 1/4 cup Rajma (Kidney beans)
  • 1/4 cup Kala Chana (Bengal Gram)
  • 1-2 tblsp Ghee (Clarified Butter)
  • 1 tsp Cumin Seeds
  • 2-3 Tej Patta
  • 2" piece of Cinnamon, coarsely ground
  • 1 tsp Garlic paste
  • 1/2 tsp Ginger paste
  • 1 medium sized onion, chopped
  • 2 green chillies, chopped
  • 1/2 tsp Haldi (Turmeric)
  • 1 tsp Red Chilli powder
  • 1-2 tsp Garam masala powder
  • 1/4 cup fresh cream (optional)
  • Salt
  • Fresh Coriander leaves

Method:

Soak the Udad, Kala Chana and Rajma for at least 6 hours. Pressure cook them with a little salt and keep aside.

Heat the Ghee in a pan. Fry the Tej Patta and Cinnamon until you get a nice aroma.

Add the cumin seeds. As they turn brown, add the onions and fry till they turn translucent.

Put in the green chillies and ginger, garlic paste and fry for some more time. Add the Haldi.

Now put in all the cooked dals, salt, red chilli powder and Garam Masala. Mix well, cover and cook on low flame for 6-8 min to allow the flavours to mix.

Remove the cover and add the chopped coriander leaves and leave on heat for a min. Switch off the flame and add the cream if using. Check for salt after the addition of cream.

Although the name is Dal 'Makhani' (buttery), I don't always add cream. The Udad already adds some creaminess to the Dal so the cream only adds to the richness, while diluting the taste some. So it is entirely dependent on what you are in the mood for :)

Jeera Rice

DSCF8556

Ingredients

  • 1 Cup Rice, preferably the Basmati variety
  • 2 tblsp Ghee (Clarified Butter)
  • 2 tsp Jeera (Cumin Seeds)
  • 2 Green Chillies, Slit lengthwise (Optional)
  • 2-3 Cloves
  • 1 Black Cardamom (Optional)
  • 1/2 tsp Salt

Method:

Wash the rice and soak it for half an hour.

Heat the Ghee in a pressure pan (or pressure cooker). Add the cloves and cardamom & fry till you get a nice aroma.

Add the jeera & green chillies. Once the jeera has browned, drain the soaked rice and add it to the tempering.

Mix well and roast for a couple of min.

Add about 1 1/2 cups of water, enough to just immerse the rice. Add the salt. The rice is not to be made sufficiently salty, hence the amount of salt is to be kept very low.

Mix and close the pressure pan and let it cook for 4 whistles (depends on the type of pressure cooker. This is cooked similar to Pulao)

Serve hot with Dal Makhani or any other Dal or even a curry with gravy.

Dal Makhani is my entry for this month's FIC at Tongue Ticklers, where the colours being featured are Black & Purple.

The Jeera Rice is on its way to the Rice Mela at Srivalli's Cooking 4 all Seasons.

While on the subject of Rice, you might also want to have a look at these...

Tuesday 4 November 2008

Coconut chutney with mint

Dosa, Idli, Paddu and the likes, form most of our weekend Breakfasts or Brunches, of course apart from the very essential Kanda Pohe!

For all these however, a mandatory accompaniment is the coconut chutney. There are various other options such as different Chutney Pudis, Sambhar etc but for me Coconut chutney is a must. This weekend's menu was Idli with Chutney & Sambhar.

One of the major problems here is that the batter does not ferment properly, however hard I try. I have tried all the available tricks, even added yeast once in desperation, resulting in a fluffy risen batter but the taste was not the same. Due to this, the necessity of a 'proper' Coconut chutney increases even more. This balances out the flaws in the resulting Idlis (A bit flat & a little hard to be precise!)

The next problem was the coconut itself! First, to find a decent one and then to grate/grind it. Back at home in India we used what is called Ilige in kannada and Vili in Marathi. Without that however, it was a pain to grate it on a normal grater or to first chop the coconut into small pieces and then grind it. This problem was solved on my last trip to India when I got this from Pune.

DSCF8774

I don't know what this is called but it has proved to be very handy for me in the kitchen as far as coconut is concerned.

Now another part of this problem was because of the mixer I have here. I was lucky enough to find a Mixer-Blender with a mill attachment, which can be used to grind things as opposed to only the blender, not at all suitable for heavy grinding. But the attachment has its own limitations. Basically it is not meant for wet grinding. But I am still managing with it and using water & liquids while grinding in spite of the instructions that tell me not to do so!

That's enough of my kitchen woes, let me come to the actual recipe now. The recipe for Idli is not a part of this post since I used ready mix for it, which I have found, is better than the unfermented home made batter although not the same as the original one!

Coconut-Mint Chutney

Ingredients

  • 2 cups fresh grated coconut
  • 4-5 Green Chilies (depending on how hot you can take)
  • 2-3 cloves Garlic
  • 2" piece of Ginger
  • 1/2 cup coriander leaves
  • 1/4 cup mint leaves
  • 2 tblsp curd
  • 2 tblsp ground Dalia (roasted split chickpea)
  • 1 tsp Sugar
  • Salt

For the tempering

  • 2 tsp oil
  • 1/2 tsp mustard seeds
  • 1/2 tsp Hing (Asafoetida)
  • 6-8 Curry leaves
  • 1/2 tsp Turmeric Powder (Optional, I haven't used it in this one)

Method:

Grind together all the ingredients using a little water. The amount of water depends on how thin or thick you want the chutney to be.

The ground Dalia gives body to the chutney, avoiding the runny consistency, in addition to enhancing the taste of the Chutney.

Prepare the tempering, add it to the Chutney & mix well.

20Aug08 033

This chutney is ideal with Idli, Dosa, Wada, Paddu etc. It can also be used as a spread for Toasts and Sandwiches.

Monday 3 November 2008

Batata Ras Bhaji (Potato with gravy)

This one has been lying in the drafts for a very long time. Probably because it has potato in it. Every time I looked at it, I would think that this can wait because its only about potato, nothing special. Some times the potato vegetable itself is taken for granted like this.

It is the one thing that most of us always have in the kitchen. I have hardly met any one who doesn't like potatoes, except maybe my friend AG, but I am hoping she will change her mind, once she tries this recipe :) A lot of people don't like Brinjal or Bittergourd or pumpkin or Okra and so on, but potato is always the favoured one. In spite of all this, Potato is almost never given the centre stage. It is generally paired with something like Methi (Fenugreek), Matar (peas), Gobhi (Cauliflower) etc. If there are guests coming in at my place, Potato is made to act like a 'Buffer'. A paneer speciality and a potato bhaji to accompany it.

Potatoes contain a number of important vitamins and minerals such as Vit C, Potassium & Vit B6. Moreover, the fiber content of a potato with skin (2 grams) equals that of many whole grain breads, pastas, and cereals. (Source: Wikipedia)

Of course the nutrition value depends a lot on the way it is cooked and the way you would want to cook depends on the type of potatoes you have. Some of the well known varieties I get here in London include Desiree, King Edward, Charlotte, White potatoes, Maris Piper etc. Some of these are suitable for boiling & mashing while some are ideal for roasting & frying.

My current favourite is the Maris Piper. I find that it is perfectly suitable for Indian style cooking including boiling and mashing. I had tried some other varieties earlier and had a difficult time mashing them for Aloo Paranthas etc. If I opted for a mashing type of Potato, it wouldn't be very good for making Bhajis (dry & gravy). But I seem to have struck a perfect balance with Maris Piper. It gives a lovely grainy texture when boiled & mashed & doesn't get sticky and also cooks very quickly when made in to a Bhaji (curry).

As I have mentioned earlier, we can survive on Potatoes any number of days. And sometimes I love to celebrate Potato just the way it is without anything else to overpower the starchy tuber. One of the favourite ways to make it is this Ras Bhaji.

Ingredients:

  • 2-3 Medium sized Potatoes, cut into small pieces.
  • 1 small Onion, sliced
  • 1 Tomato, chopped
  • 2 Green Chilies, chopped
  • 1 tblsp oil
  • 1 tsp Mustard seeds
  • 1 tsp Cumin seeds
  • 8-10 Curry leaves
  • 1/2 tsp Hing (Asafoetida)
  • 1/2 tsp Haldi (Turmeric powder)
  • 2-3 tsp Goda Masala (Or any other curry masala)
  • 1 tsp red chili powder
  • 1 tsp Sugar
  • Salt
  • Lime juice
  • Coriander leaves, chopped

Method:

Heat the oil in a Kadai/Pan. Splutter the mustard & cumin seeds. Add the curry leaves, Hing and Haldi.

Add the sliced onion & saute till the onions turn translucent. Add the potatoes & chopped tomato and mix. Cook for 5 min with a cover on.

Remove the cover and add salt, Goda Masala & red chili powder and mix properly.

Goda Masala, also called the Black Masala, is the traditional Maharashtrian spice mix used for Bhaji, Amthi etc. In the absence of this Masala any other curry masala can be used but the taste will be a little different.

Add about 2 cups of water and bring to a boil. Then, let the bhaji cook on a slow flame without cover.

After about 10-15 min, check if the potatoes are done and switch off the flame. We wouldn't want the water in the Bhaji to get over since this is a Ras (Gravy) Bhaji.

Add chopped coriander leaves and a dash of lime juice just before serving.

2008_0414fuji0034

This can be had with rotis or Chapatis but its ideal with Pav, bun or even Bread slices. Add some chopped onions & sev for that extra crunch and enjoy!

Monday 27 October 2008

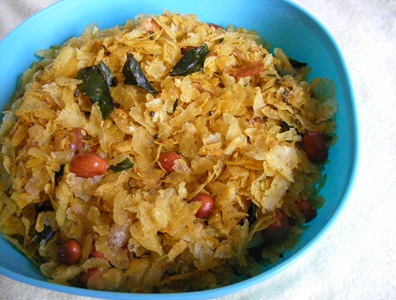
Chivda

I can not think of any other festival other than Diwali, where the spotlight is on the food. Agreed that it is supposed to be 'Festival of lights', after all the literal translation of Deepavali is 'A line of lights'. But still food has become the most important part of this festival too, as with so many others.

The preparations (read cooking!) start well in advance, sometimes with weeks still to go. The list of items made is endless if one has the time, energy & enthusiasm for it. In fact 'Faral' as these food items are collectively called, are sometimes the only dishes consumed during the odd 4-5 days. Faral for breakfast, Faral with lunch, Faral for evening snacks with Tea/Coffee, Faral again with whatevers made for Dinner. Atleast this was what was followed at my place.

Some of the main constituents of this Faral are

  • Chivda, made mainly from Patal Pohe (Thin beaten rice) & may sometimes also contain murmura (puffed rice).
  • Chakali
  • Sev
  • Ladoo, various types such as Besan(chickpea flour), Rava(Semolina), Rava-Besan, Nariyal(coconut) etc
  • Shankar Pale both sweet & savoury
  • Karanji
  • Chirote
  • Anarasa

What I have listed out here are some of the traditional Faral items. Other items such as Burfi, Gulab Jamun, Rasgulla, Halwa and anything else you can think of are additions based on individual taste.

Personally I like the savoury snacks better than the sweet ones. Give me Chakali anytime & I will happily munch away, but I have to be 'in the mood for sweets' if you offer me a Besan Ladoo!

I make Chivda very often to keep a snack handy, better than gorging on those potato wedges, crisps, fries etc. Since these items are readily available & its quite natural & easy to choose them whenever one feels like having a just a little something. So to avoid that I make Chivda & store it for such evenings. It even serves us as a breakfast item sometimes along with a dollop of curd which compliments the crunchy chivda very well.

Ingredients

  • 250 gm Thin Beaten Rice (Patal Pohe)
  • 3 tblsp oil
  • 2 tsp mustard seeds
  • 2 tsp Cumin seeds
  • 12-15 curry leaves
  • 1 tsp Hing (Asafoetida)
  • 2 tsp Haldi (Turmeric powder)
  • 2-3 tsp red chili powder
  • 1-2 tblsp coarsely ground coriander seeds
  • 1/2 cup peanuts and/or Dalia (roasted split chickpea)
  • 1-2 tsp sugar
  • salt to taste

Method:

Heat the oil in a large Kadai. Its very important to use a large kadai/ deep pan since you will need space to turn over the pohe from time to time.

Once the oil is hot, splutter the mustard & cumin seeds. Add the curry leaves & peanuts and fry for sometime.

Add the Hing, Haldi, red chili powder  & ground coriander. If you dont have coriander seeds, you can use Coriander powder instead.

Mix everything properly on low flame, taking care not to let the masalas burn. Add the salt & mix well.

Add the Patal Pohe and mix till the Pohe are properly coated. Add in the sugar and mix. Check for salt & add some more if needed.

Continue to heat on low flame for approx 15-20 min and keep turning the pohe to roast them properly. This part has to be done very patiently. If you keep the flame high to finish it off quickly, you will get some burnt pohe & the rest will remain as they are. The key is to keep turning them every 3-4 min and do this on low flame.

To speed up things or rather to avoid standing & staring at the pohe as they get crunchy, pre heat the oven to 200 deg C. Rub the pohe with 2 tsp of oil and roast in the oven for about 8-10 min. Keep checking in between. Take them out once they are crunchy and proceed normally. Once the pohe are coated well with oil & masala from the phodni, the work is done, since they are already crunchy!

I have tried this & it really works but I still prefer the stove top method.

Turn off the flame and spread the chivda to cool.

20Aug08 309

Once cool, store in air tight containers. You can mix some baarik (thin) sev with the Chivda. Red Chili powder can be replaced with chopped green chillies, if you opt for that, add them along with the curry leaves and fry them too.

Chivda can be stored for as long as 3-4 weeks if stored properly in dry air tight containers.

You can also try making  Mysore Pak from this blog, this Diwali!

Wishing everyone a very Happy Diwali!

Thursday 23 October 2008

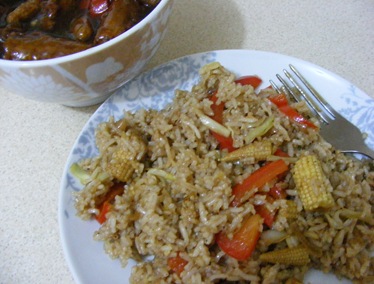
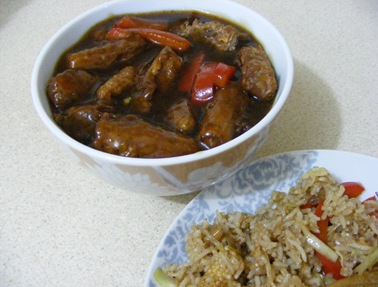
Fried Rice with Baby Corn Manchurian

My association with Chinese food, or rather what is popularly called the Indo-Chinese food can be best described by saying that I absolutely can not survive without it. And the one time that I was forced to live without it, was like a nightmare for me to say the least. But more about it later.

Authentic Chinese is no where close to what we get in Indian restaurants under the name of Chinese cuisine. The real Chinese food is a lot less spicier and even most of the vegetables etc used in the Indian restaurants never feature in Chinese food, examples being Cauliflower, Paneer (Cottage Cheese) etc. You even get to see peas, Jeera (Cumin seeds), Coriander leaves, Curry leaves etc in some of the restaurants! While I don't want to have curry leaves in my chinese food (!) I also don't prefer the actual blander version of chinese food.

Chinese food also features prominently in my memories whenever I think of my college days & my close friends, my best friend SS in particular. Both of us were crazily into Chinese food. We didn't have to think at all when placing an order in any restaurant. It would invariably be Chinese. Even after passing out of college whenever we met after work, most of the time it used to be Chinese for us.

But all this was put on hold when I developed an allergy to Chinese food, it might have been the soy sauce or one of the other ingredients actually. I never found out what it was but whenever I ate chinese food, I would get nauseated and spend that & the next day vomiting my lungs out! This proved be a very difficult time for both of us. I couldn't have chinese even though I wanted to and because of this even SS couldn't have it. We would reluctantly settle on Pav Bhaji and miss the Hakka Noodles & Manchurian terribly.

The day I discovered that my allergy was gone was one of the happiest days of my life. SS always asked me to see if the allergy was gone. 'If you wont try, how will you know', she would say. But I always put it off, thinking about the bad time I would have. But that day the craving was so bad that I decided to take a chance and was glad that I did!

As with so many other things, I miss the Indian style Chinese food here in London, and have to make it at home if we want it. Only recently I have discovered that 'Tulsi' restaurant in Wembley serves 'authentic' 'Indian style Chinese' ! Their Hakka Noodles is a must try!

Veg Fried Rice

5Aug08 097
Serves 2

Ingredients

2 cups rice, preferably the Basmati variety
2 tsps Garlic, chopped finely or minced
1 tsp Ginger, finely chopped
2 Green Chillies, slit (Optional)
2 tblsp Soy Sauce
1 tblsp White Vinegar
2 Cups sliced/shredded Vegetables (Capsicum, Carrot, Cabbage)
2 tblsp Oil
Salt
Pepper Powder
Method:

Cook the rice such that the grains are separated. To do this, I add a little less water than usual and 2 drops of oil while I pressure cook it. Once cooked, spread out the rice to cool down.

In a wok, heat the oil and fry the ginger & garlic. Add the Green Chillies and saute.

Throw in the vegetables and saute on high flame. I some times add Baby corn to the rice as well.

Add the soy sauce, vinegar, salt and pepper and mix thoroughly. Now add the cooked rice and keep mixing on high heat. Adjust the seasoning and serve hot, with Baby Corn Manchurian.

Baby Corn Manchurian

5Aug08 099

Serves 2

Ingredients

For the dumplings

  • 8-10 Baby Corns, cut into bite size pieces
  • 4 tblsp Maida (Plain Flour)
  • 2 tblsp Cornflour
  • 1/2 tsp Ginger paste
  • 1/2 tsp Garlic paste
  • 1 tsp Soy Sauce

For the gravy

  • 1/2 cup Sliced vegetables such as spring onion, capsicum (optional)
  • 2 tsp minced Garlic
  • 2 tsp grated ginger
  • 2 tblsp Soy Sauce
  • 1 tblsp White Vinegar
  • 2/3 tblsp Cornflour
  • salt
  • Pepper


Oil for frying and for the gravy

Method:

Prepare a thick batter with the Maida, corn flour, ginger & garlic pastes, Soy sauce, salt, pepper powder and water.

Heat oil in kadai. Dip the baby corn pieces into the prepared batter and fry till crisp. Remove on kitchen towel and reserve.

Heat 1 tblsp oil in a wok. Add the ginger and garlic and fry for half a minute. Add the sliced vegetables if using and saute on high flame. Add the soy sauce & vinegar and cook on high flame.

Add 1/2 cup of water, salt & pepper and bring to boil. Dissolve 2/3 tblsp of corn flour in a little cold water and add this to the Manchurian.

Heat while continuously stirring as the gravy thickens. Cook till it reaches the desired consistency and then add the fried Baby Corn. Mix properly and switch off the heat. Garnish with Spring Onion greens and serve hot.

To make this into a dry Manchurian, reduce the quantity of water to around 2-3 tblsp and the corn flour to just 1 tblsp.

Wednesday 15 October 2008

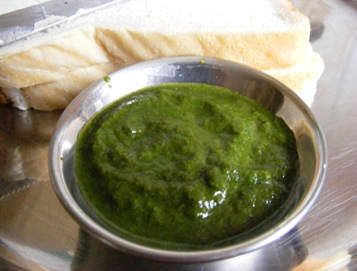
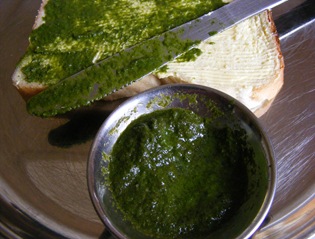
The Versatile Green Chutney

Versatile because it can be used in so many different ways. It can be served as an accompaniment with savoury items such as Bhajiyas, Samosas, Wadas, Fries and so on. It is a must when making Chaat items such as Sev Puri, Dahi Bata Puri etc. The Sandwiches sold on the streets of Bombay, which otherwise have the same basic ingredients, are made famous by this very Chutney, adding that special touch to the bread slices.

It is also versatile because, keeping the basic ingredients intact, one can play around with the ingredients, adding some or even changing  the quantity of each item depending on personal preferences. But Coriander remains the basic central ingredient.

Although the classic name for this is Dhaniya Pudine ki chutney (Coriander-Mint Chutney), I even skip the Pudina (Mint) sometimes but the chutney turns out to be delicious all the same. This time I had almost all the classic ingredients with me.

I have recently started to put the huge freezer (bigger than the refrigerator itself!) to good use. I make this chutney in bulk whenever I lay my hands on a fresh bunch of Dhaniya & Mint and then freeze it small quantities (each equal to the amount I use for a single time). Whenever I need the chutney, I just take out one of the small containers and thaw it in the fridge overnight. Another reason for making this in bulk is the same old problem of my Mixer, which is not all suitable for grinding in small quantities!

Dhaniya Pudine ki Chutney

DSCF8822

Ingredients

  • 2 cups fresh Coriander leaves
  • 1/4 cup Mint leaves
  • 2-3 cloves of Garlic
  • 2" piece of Ginger
  • 5-6 Green Chillies
  • 1/4 cup grated coconut (Optional)
  • 2 tblsp Lime Juice
  • 1/2 tsp Sugar
  • Salt

Method:

Combine all the ingredients and grind them using a little water as required.

The grated coconut is optional but it gives volume to the chutney and also enhances the taste. I sometimes use ground Dalia (roasted split chickpea) in place of the coconut and it serves the same purpose while changing the taste a bit.

The number of green chillies can be adjusted depending on the spice level you are comfortable with.

DSCF8827

The simplest ay to enjoy this chutney is to make a Chutney Sandwich. Take two slices of bread and apply butter on both. Spread the chutney on one slice and a little Tomato ketchup on the other. Place one slice on the other face down and take a bite!

This Chutney will reach Siri's Corner just in time for this month's Herb Mania - Coriander. Herb Mania is an event started by Dee of Ammalu's Kitchen.

Thursday 9 October 2008

Naivedya Series: Kadabu

On the occasion of Dasara, I am continuing with the Naivedya series with yet another Chana Dal (Split chickpea) based sweet dish called Kadabu in kannada. Lookswise Kadabu is similar to the famous Karanji but made with whole wheat flour as opposed to Maida (Plain flour) and the filling is also different.

In kannada, specifically in the North Karnataka region, Kadabu is also used as a slang for a beating! A story associated with this comes to mind.

A man once gets to taste Kadabu for the first time at a friends place and likes it very much. He comes back home & tells his wife about it but forgets the name of the dish.

After a few days, he feels like eating them and asks his wife if she can prepare them, but since he hasn't told her the name of the dish, she is not able to understand what to make. he then tries to describe it to her saying that its fried, has a sweet filling and so on. She still doesn't understand anything and keeps asking him about it. They have a huge fight over this and in anger the husband slaps her hard.

Just as all this is happening the lady's father comes home & gets worried on seeing his daughter crying. He goes to her & asks her what the matter is & why her cheeks are puffed up like a Kadabu? The husband jumps at this & finally remembers the name!

We used to laugh at this story every time it was told, which means practically every time we made kadabu at our place :)

These Kadabus are on their way to Srivalli's Cooking for all seasons, who is the host for this month's JFI - Festival Treats.

Also sending this to Sweet Series hosted by Mythreyee of Paajaka Recipes.

Kadabu

Makes about 8-10 Kadabus

Ingredients

  • 1 cup Chana Dal (Split Chick Pea)
  • 3/4 cup grated Jaggery
  • 1/4 cup chopped small pieces of Dry coconut
  • 1/2 tsp Cardamom Powder
  • Dry fruits such as Cashew, Almonds, Walnut, raisins etc (Optional)
  • 2 cups Wheat flour
  • Oil for frying

Method:

Pressure cook the Chana Dal and drain the water. Mash the Dal properly and put to heat in a pan . Add the grated jaggery and mix properly.

Add the grated coconut and Cardamom powder and conitnue to cook till all the water dries out and you get a homogenous mixture. This is called the Puran, the filling. Add the dry fruits if using and mix well.

Prepare a stiff dough with the wheat flour using some water. Make small lemon sized balls and roll out small slightly oblong pooris. Avoid using any flour while rolling out the dough as much as possible. I generally use a drop of oil in place of the flour. This prevents the oil from getting contaminated with burnt flour, while frying.

Place some of the filling in the middle along the length and close the poori to cover it. Seal the edges by pressing them together very tightly. This has to be done properly since we don't want the filling coming out while frying the Kadabu.

Heat oil in a deep kadai and fry the Kadabu over medium slow flame, turning them from time to time, until brown & crisp.

 20Aug08 204

The classic way of serving them is to make a small hole in the middle and fill it up with Ghee/Toop/Tuppa (Clarified Butter), the more the better :) festivals are after all for indulging!

Wishing everyone a very Happy Dasara!

Tuesday 30 September 2008

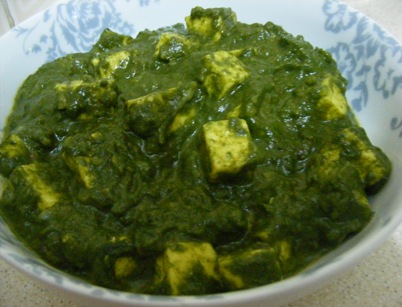
Palak Paneer

One of the favourites on the restaurant menus, I have never really loved this one but we do have this occasionally i.e. whenever I feel that it has been a long time since we had Spinach. For me this is the best way to have Palak (Spinach).

Funnily enough, I have never really liked the taste of this dish in any of the restaurants. The home made version is the best! Specially so when most of the restaurants, here in London are Bangladeshi converts, where it appears in the guise of Sag Poneer alongside Motor Poneer! We were once 'compelled' to order this for home delivery and what we got was a container full of Spinach leaves blanched in salty water, with some Paneer (Cottage cheese) pieces thrown here & there. Thats it! No spices. Or may be there were some traces of Garam Masala. This episode hardened my resolve to

1) Avoiding getting Indian take away/home delivery unless we completely trusted the restaurant

2) Never order Palak Paneer even if we did get a Take away!

And how do I make it at home?

Serves 2

Ingredients

  • 200 gm Spinach
  • 2 cups Paneer cubes
  • 1 Medium sized onion, grated
  • 1 medium sized tomato, pureed
  • 1 tsp Garlic paste
  • 1/2 tsp Ginger paste
  • 1 tsp cumin seeds
  • 2 tsps Garam Masala
  • 1 tsp Coriander powder
  • 1 tsp Red Chili powder
  • salt
  • 1 tblsp Oil

Method:

Blanch the spinach and allow to cool. The spinach is not to be boiled but just immersed in boiling water for 2 minutes or so and then removed and set to cool. When it is cool enough to handle, make a puree and keep aside.

Heat the oil in a pan and splutter the cumin seeds. Fry the grated onion until the raw smell goes away or rather until you stop shedding tears in the kitchen! Notice how grating the onion makes you cry even more, both while grating it & then while frying it. You may switch on the exhaust, open the windows, but you cant avoid the tears :)

The next step is to add the ginger & Garlic paste and fry for some more time (2-3 min). Then add the tomato puree and cook till the oil separates out.

Next, add the Garam Masala, Coriander powder & red chili powder and mix well. Add the Spinach puree, Paneer cubes & salt and mix.

If you want the spinach gravy to be thinner, add milk instead of water. This results in a creamy gravy without any water separating out of it. Cover and cook for 5-7 min.

Picture 275

Serve hot with Chapatis/ Phulka/ Naan/Rotis and forget the wannabe Punjabi food serving, so called Indian restaurants (atleast for this one item)!

This is my entry for FIC-Green event at Tongue Ticklers.

Thursday 25 September 2008

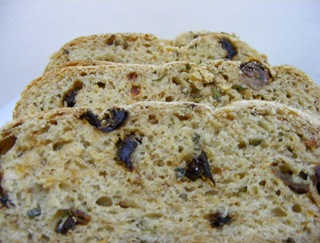
Tomato, Herb & Cheese Bread

For a long time I had not understood why you were supposed to 'say cheese' while getting your snap clicked. Then one day I realised the purpose and from then on I have always wondered, isn't it easier & more understandable to just ask the person to smile? Cheese! I mean :)

But the phrase has a totally different meaning in this post. If Siri asks us to Say Cheese we do so!

SayCheese

This is my second time with the Y thing - 'yeast', and the skepticism is fading away with each effort. Of course a lot has to do with the recipes I am following, first these delicious Pav from Jugalbandi and now a Tomato Herb & Cheese Bread from Mansi at Fun and Food blog.

I halved the recipe and made only one loaf but regretted that, the moment I tasted this bread. I really should have made more!

 25thSept08 305

This Herb Bread with a lot of Parmesan Cheese is off to Siri's Corner for this month's MBP - Say Cheese. Thanks Siri for hosting this event & thanks a lot Manasi for this fabulous recipe.

Tuesday 23 September 2008

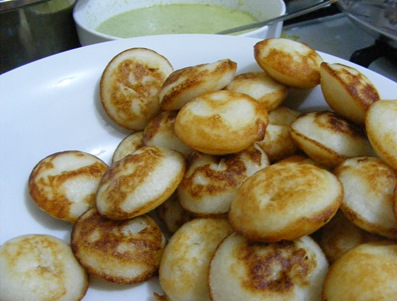
The round ones with the complicated name

They are called Gundpongalya. Here is the pronunciation guide...

Gund - pronounced just as in the Gunda(thug) without the aa sound

ponga - pronounced as in pongal

lya - pronounced as in Tendlya(the unofficial nickname for Sachin)

Now, if this is not complicated, what is?

This is a favourite of mine and so many others I know who have tasted it at my home. It used to be the rage whenever I carried it in my lunch box in school or college.

The only problem was to tell the others what it was called. The name is tough enough to pronounce even for some Kannada people I know (including D, my brother - he makes it sound like a completely alien dish). The first time I took it to school in Delhi, I received bewildered stares from all my north Indian friends when I announced that I had got Gundpongalya in my lunchbox. Inspite of the non-culinary sounding name to them, they loved it. So much so that I started getting demands from them to get it again & again. And they started referring to it as 'The round ones with the complicated name'!

Life became much easier when I discovered that they are also called 'Paddu'(rhyming with laddu). Although we still call it by the original name at home.

This is an ideal weekend breakfast for us. Sometimes even acting as lunch or dinner, if we want.

Ingredients

  • 1 cup Urad Dal (Split Black Gram)
  • 2 cups rice
  • 2 tblsp Pohe (Beaten rice )
  • 1 tsp fenugreek seeds
  • 1 Onion, chopped
  • Salt
  • Oil to cook

Method:

Soak the Urad Dal, Rice and fenugreek seeds for 6-8 hours. Soak the Pohe 10 minutes before preparing the batter.

Grind together urad dal, fenugreek, rice & pohe just like the Dosa batter but the final batter should be coarser than the Dosa batter.

Let the batter ferment overnight. The 'Paddu' turn out light & fluffy on the inside if the batter is fermented well.

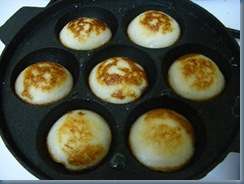
Put an Appam pan to heat. Add salt and chopped onions to the batter and mix well.

Add about 1/4 tsp oil in each of the sections of the pan. Spoon out the batter into these sections. Cover and cook for 3-4 min. Remove cover and turn them over and again cook for 2-3 minutes. Remove once they are thoroughly cooked, having a crisp outside but soft & fluffy inside.

Picture 227

The temperature at which the cooking is done, is very important. If the flame is too low, the Paddu will take a long time to cook and the result will not be the desired one. But if the flame is too high, the outer cover will get crisp & brown very fast and the insides will not be properly cooked. Gauge the optimum temperature while cooking the first batch and then adjust accordingly.

Picture 232

Serve hot with coconut chutney and/or Sambhar.

PS: Add chopped green chilies, curry leaves and ginger to the batter for a spicier version of Paddu!

Friday 19 September 2008

I am singing again.....

Cooking had never been a chore for me until about a year ago. Things changed a bit, rather a lot, when I came back to London from India, with 3 months old S. Looking after her became the priority naturally and even when I was not tending to her, I had so much to do that I forgot for a while how I used to enjoy cooking new dishes. Earlier, any one entering the kitchen would find me either humming a tune while I was chopping the vegetables or talking to myself (yeah, it may sound crazy!) about what all was needed to be done for a particular dish.

Now cooking was confined to the basic - Chapati, Bhaji & sometimes Rice items. Even dishing out the simple & quick ones started sounding like a Herculean task. S has always been very active right from the moment she was born. As she is getting older its getting more & more difficult to manage her (read control her running around!). So the whole day was spent in making one meal (just chapati & bhaji), working in shifts whenever S fell asleep.  If I got some time to myself in the kitchen when GM was looking after her, my mind would be full of thoughts about what all was still to be done before I could manage to sleep in the night (not before12 anyway!) - nappies, baby food, washing clothes & utensils, planning for the next day meal etc dominated my thoughts. With so much going through in my mind, the cooking process became very automated, I did not even pay attention to what I was doing.

But things  changed again when I started this blog. I started making an effort to take time out so that I could pay attention to this passion of mine - cooking! I started looking out for new recipes again, started talking to myself about what I was going to do next in the course of making a dish. And most important of all - I started singing again! I am glad that I am back to enjoying my time in the kitchen by the time that I am writing this 50th post on this blog!

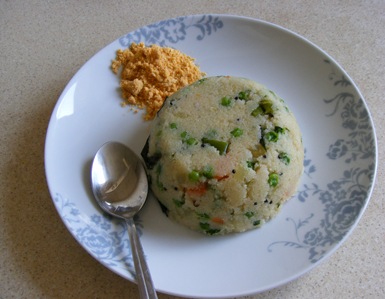
Last week when I was getting things ready to make this 'Upma'. I realised that I was actually humming! I dont even remember which song it was but I was enjoying what I was doing. I am really glad that I started blogging, not just writing but reading other blogs as well.

Coming to the recipe, Upma called Uppittu in kannada, is not really a favourite. I never liked it and would avoid eating it whenever I could and whenever I did consent to eating, it had to be steaming hot. I only liked it that way. Since GM doesnt like it too, we rarely make it if ever. This time it was made for lack of quick breakfast option on a weekend (of course after we had already made the Pohe on Saturday!).

Vegetable Upma

Serves 2

Ingredients

  • 1 cup Rawa (Semolina)
  • 1 medium sized onion, chopped
  • 1/2 cup vegetables (I used peas, beans & carrot)
  • 2 Green Chillies, chopped
  • 1 tblsp oil
  • 1/2 tsp mustard seeds
  • 8-10 curry leaves
  • 1/2 tsp Urad dal (Split Black gram)
  • 1/2 tsp Sugar
  • salt
  • Lime juice

Method:

Roast the rawa in a pan/kadai till it lets out an aroma and starts turning slightly brown. The roasting can be dry or in 1 tsp of oil. Keep this aside.

Heat 1 tblsp of oil in a kadai. When hot, add the mustard seeds and let them splutter. Add the curry leaves and the Urad Dal.

Once the dal browns slightly, add the green chili & onion. Saute for sometime. Add a little more than 2 cups of water. The quantity of water can be increased a little if you want the Upma to be very mushy but decreasing the quantity will result in very dry Upma. The thumb rule is that the amount of water should be double than that of the rawa.

When the water starts to boil, add salt and mix. Now add the roasted Rawa in small quantities while stirring continuously to avoid the formation of lumps. Mix well and then cover & cook till all the water is absorbed.

Add the sugar and a dash of lime juice, mix and serve hot. It pairs very well with Baarik (thin) Sev or any other farsan. Chutney powder such as this one or pickle is also sometimes served with Upma.

2008_0414fuji0053

I have grown to be a little more tolerant to this easy & 'quick to make' breakfast item and so it has started making an occasional appearance in our kitchen nowadays.


Tuesday 16 September 2008

Methi Matar Malai

I consider myself very lucky because I get almost all the Indian supplies in this part of London where I live. I have some friends staying in other areas who are actually envious of me because of this. Grocery items such as the wheat flour, spices and some special items like Pohe (beaten rice), Rawa (Semolina), Murmura (Puffed rice), tamarind, Jaggery - you name it & I get it here at the local Tesco store.

For those who don't have easy access to these things, it is possible to hunt for these items & store them for a long time, say a month or until they again go to that particular store. What makes the real difference is getting the vegetables such as Drumstick, curry leaves, Gawar (cluster beans), Methi (Fenugreek), small brinjals, Kairi (raw mangoes), Dudhi (bottlegourd), Bittergourds etc.

Even though I get these veggies easily here, there are times when you don't see a particular vegetable in the shops for a long time. For this reason, whenever I do get them I stock up on them as if we are never going to get it again :) But even while I am paying for them at the store, the only thought running through the mind is how to utilise them before they get spoilt & wasted, especially the green leafy vegetables, which have a short life span in the refrigerator.

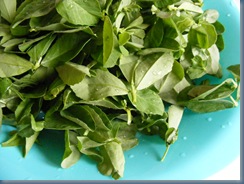
Picture 002

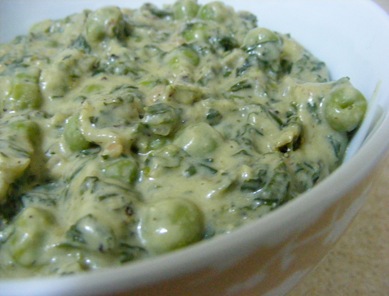
Last week when I saw these very fresh looking Methi (Fenugreek) bunches, I immediately picked up a couple of big ones. One was used to make these Thepla style Paranthas. The other was awaiting its turn in the refrigerator all plucked & cleaned up when it struck me that it had been a really long time since we had had Methi Matar Malai, a rich creamy preparation of Fenugreek & Peas.

Serves 2-3

Ingredients

  • 3 cups chopped Methi (Fenugreek)
  • 1 cup Green Peas
  • 1 onion, chopped
  • 2 Tomatoes
  • 1 tsp Sugar
  • 1 tblsp oil
  • 2 tsps Cumin Seeds
  • 1/2 cup milk

To be ground into a paste

  • 1 onion
  • 2 Green Chillies
  • 1" piece of Ginger
  • 2 cloves of garlic
  • 3 tblsp Cashew
  • 2 tsp khus khus (Poppy seeds)

For the dry masala powder

  • 2" Cinnamon stick
  • 2-3 cloves
  • 2 cardamoms
  • 3-4 peppercorns
  • 1 tsp cumin seeds

Method:

Heat 1/2 tblsp oil in a pan and add 1 tsp cumin seeds. When they crackle add the chopped Methi leaves and saute for 3-4 minutes. Remove from fire and reserve. The original recipe actually called for the methi leaves to be mixed with 1-2 tsp salt & kept for 15 minutes, the leaves are then to be squeezed to get rid of the water. This is done to reduce the bitterness of the Methi leaves. I always skip this part because I like the slight bitter taste and also since the methi leaves available here are not that bitter anyway!

Blanch the tomatoes, peel, puree and keep aside.

Dry roast all the ingredients for the dry Masala and grind them to get a powder. Alternatively you can crush them in a mortar but the result will not be a fine powder.

To make the wet paste of onion & other ingredients, first dry grind the cashew and then add the other items and a bit of water if required, to get a smooth paste.

Heat the remaining 1/2 tblsp oil. Add the chopped onion & fry till they turn golden brown. Add the onion-cashew paste and fry for some more time. Add the dry masala and the tomato puree and cook for about 5 minutes.

Add the peas, methi, milk, sugar and salt, mix and cook for 10-12 minutes.

Add the cream and turn off the flame. Mix well.

Picture 179

Serve hot with Roti, Phulkas, chapatis or Naans.

This is one of the few sweet tasting (very slightly!) curry/bhaji that we like, otherwise sweet gravies are a strict no-no for us. The combination of sweet & spicy is the main flavour of this dish.

Friday 12 September 2008

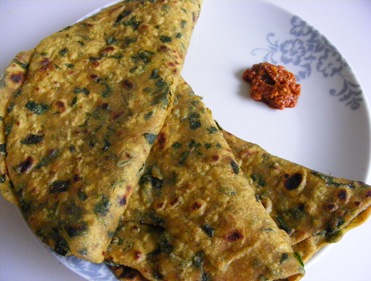
Methi Parantha

Thanks to Dee's Herb Mania, I now know that Methi (Fenugreek) is a herb and not just a green vegetable! Although I use Kasuri Methi extensively to flavour a lot of dishes, it never struck me that fresh Methi could be a herb. But now I know :)

One of the main reasons for this ignorance could be that, in India we rarely use Methi as a herb. Most of the times it is the main ingredient in the particular dish, for example this Aloo Methi. For me, a herb is something which is used to flavour the dish. In that sense I could never imagine Methi to be a herb.

Another such example is Dill, Shepu in Marathi & Sabbasge in kannada. This is considered to be a herb but prepared as a complete bhaji at home.

The methi paranthas that I make are somewhere in between the actual parantha & a methi thepla. They are not really paranthas because I dont stuff the methi in the dough like some people do but mix the methi leaves while preparing the dough itself as in a thepla. But they are not theplas as well because I dont use any besan (Chickpea flour) in the dough which is a part of a traditional thepla. And the usage of oil is considerably less than that in a thepla.

Makes 6-8 Paranthas

Ingredients

  • 2 cups chopped Methi (Fenugreek) Leaves
  • 2 cups Wheat flour
  • 1/2 tsp Haldi (Turmeric Powder)
  • 2 tsp Red Chili powder
  • 1 tsp Garam Masala
  • Salt
  • Oil for cooking

Method:

Mix all the ingredients except oil and make a pliable dough using water. The dough should not be too soft as the Methi will let out water and it will turn soggier after sometime. Leave to rest for about 15-20 min so that the flavour of Methi gets assimilated in the dough.

Divide the dough into 6-8 equal portions. Shape them into balls and then roll out into round paranthas using a little flour to prevent sticking. The parantha should not be too thin & not too thick either.

Heat a Tawa (Griddle) and place the rolled out Parantha. Cook 1-2 min and then turn. Cook again for a minute and then drizzle some oil on the sides and also on the surface of the parantha. Turn it again and repeat.

Cook well till the parantha is properly cooked & looks crisp on both the sides.

Picture 005

Serve with Chhunda, pickle or plain old Tomato ketchup.

This goes to this month's Herb Mania, being hosted by Red Chillies.

Tuesday 9 September 2008

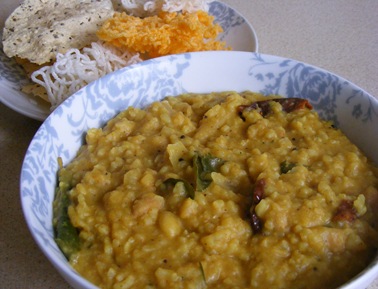
Bisibele Bhaat

Picture this: Its 9 at night (or 2 in the afternoon) & you haven't yet decided what to cook for dinner (or lunch). You are in the mood for something special but don't know what. And now its too late to prepare for an elaborate meal anyway. And since you started to think about the dinner (or lunch) with something very special, you don't feel like settling for a Khichdi, Amthi Bhaat or any such 'ready in a jiffy' dish.

My solution to this situation is 'Bisibele Bhaat'. This is nothing but a combination of Toor Dal (pigeon pea) and rice cooked with some vegetables (sometimes none) and spices. Bele means Dal (Lentil) and Bhaat means Rice in kannada. Bisi, which means hot, could be either to describe the spicyness of this dish or to stress that this is supposed to be had piping hot to truly enjoy it.

In other words, instead of serving rice & Amthi (Sambhar to be precise) separately, you mix them up and serve it as a special dish :) I have always wondered why it tastes so different from the normal Sambhar rice, when you are using exactly the same ingredients!

Serves 2

Ingredients

  • 1 cup Rice
  • 1 cup Toor Dal (pigeon pea)
  • 1/2 cup vegetables (onion, tomato, brinjal, pumpkin or any combination, I sometimes use only onions)
  • 1/2 tsp mustard seeds
  • 10-12 Curry Leaves
  • 1/2 tsp Hing (Asafoetida)
  • 1/2 tsp Haldi (Turmeric Powder)
  • 1/4 cup Peanuts
  • 3-4 tsps Sambhar Powder (I make this powder at home but any store bought Sambhar Masala such as MTR, Everest etc can be used)
  • 2-3 tsps Red Chili Powder
  • 3 tblsp Tamarind pulp
  • 2 tblsp grated Jaggery (Optional - this can be skipped if you don't want a sweet tinge to the Bhaat)
  • 2 tblsp Oil
  • Salt

Method:

Cook the rice & the Toor dal in a pressure cooker and keep aside. It is very important for the quantity of the Dal to be same (or even more than) as that of rice.

Heat the oil in a large pan and add the mustard seeds. Once they start spluttering, add the curry leaves, Hing, Haldi and the peanuts.

When the peanuts are a little roasted/fried add the chopped vegetables and saute. Add the cooked rice & Dal and 1/2 cup water and mix.

Add the tamarind, spices, jaggery & salt and mix thoroughly.

Cover and cook for 5-7 minutes. Keep stirring to avoid the rice sticking to the bottom of the pan.

Remove the cover and cook on sim until the water evaporates. But the Bhaat should not be very dry. This Bhaat has a paste like consistency just the way it will be if Sambhar is mixed in cooked rice!

Add a generous amount of Toop/Tuppa/Ghee (Clarified Butter) and serve hot with Papad & pickle.

5Aug08 087

If we leave out the time taken to cook the rice & Dal, this dish is ready in about 15 minutes and is very easy to plan and make. Its funny how delicacies are born out of conveniences!

Friday 5 September 2008

Naivedya Series: Haygreev

Food is the most important aspect of life. Its no surprise therefore, that it plays a major role in our celebrations as well. Thanksgiving is unthinkable without the Turkey. Christmas Pie is so named because its a must during Christmas. In India also, all the festivals and occasions are marked by specific food items that are absolutely necessary for these celebrations to be complete. Modak for Ganpati, Puran Poli for Devi and so on. On a lighter note, we made sure that we went to the Sai Baba Temple near our house in Delhi every Thursday for the prasad - Poori, Halwa & Kala Chana :)

The point is that food plays such a major role in the worship of God, that I decided to dedicate a whole series to food items particularly meant for the 'Naivedya'.

'Naivedya', in sanskrit means the offering made to God. And this offering is very special, not anything would do. There are some rules to be followed, some specific dishes to be served and a format to be taken care of. Any 'pooja' is not complete without the 'Naivedya'.

The Naivedya consists of the complete thali containing everything right from Chutney, Koshimbir, Sambhar/Saaru, Bhaaji, Kheer, Poori, Bhaat, Masale Bhaat/Chitranna, Papad/Kurdai/Bhaji etc. But as mentioned earlier, all these items have to be made with special care. Garlic & Onions are not allowed. Any vegetable will not do. Some, like Brinjal, Okra etc are not allowed. And depending on the pooja, some specific dishes have to be included.

Naivedya can take on various forms depending upon the type of Pooja, timing of pooja and even the Gods/Goddesses it is offered to. In this series I will try to cover all these items, specifically those prepared in our household.

I am starting off with a 'Sweet', a must, when it comes to Naivedya.

Generally while worshipping the 'Devi' the Naivedya should include Hoorna (kannada) or Puran(Marathi) made of Chana Dal (Split chickpea) and Jaggery. Now, this can take on various forms such as the very famous Puran Poli, the not so known Kadabu and Haygreev,  which is almost like Kheer. Of these, Haygreev is the easiest and quickest to make.

Serves 2

Ingredients

  • 1 cup Chana Dal
  • 1 cup grated Jaggery
  • 2 tsps Khus Khus (Poppy seeds)
  • 2 tblsp grated dry coconut
  • 1/2 tsp Cardamom Powder

Method:

Pressure Cook the Dal till it is properly cooked but not completely mashed. For Puran Poli, we require the Dal to be cooked till it mashes but not so for Haygreev.

The water in which the Dal is boiled along with some Dal is usually reserved. This is used to prepare Kattina Saaru/Katachi Amthi, recipe to follow in a later post.

Once the Dal is cooked, transfer it to a pan and put on heat. Add the Jaggery and other ingredients and mix properly.

Cook on medium flame till the water reduces and it achieves paste like consistency with some bits of Dal in it. The Dal is never to be mashed.

5Aug08 114

This is almost always had with Tuppa/Toop/Ghee (Clarified Butter), which anyway is a must for the Naivedya.

Variations can include the addition of dry fruits such as Cashew Nuts, Almonds, raisins etc. Around 1 tsp of Nutmeg powder can also be added for extra flavour.

Having said so much about the pooja & Naivedya, I would also like to add that these food items are never restricted to be made on these days only and can be made any day to turn the daily meal into a special one!

Tuesday 2 September 2008

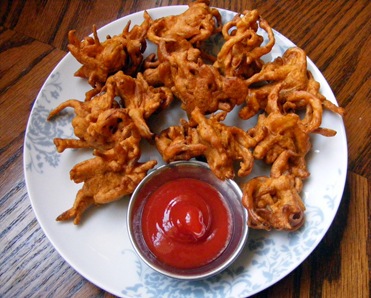
Kanda Bhaji (Onion Pakoras/Fritters)

It was raining heavily in India (Bombay & Pune) when I started to write this post. As regards to London, its always raining or rather drizzling throughout the year. Much has been said about the British weather and believe me its not enough. You have to really experience it to know the seriousness. The only certain part is the cold. It will be definitely cold in Nov-Dec-Jan-Feb. For the other months you never know. For the first timer, specially from Bombay it may seem that it is cold throughout the year but there is supposed to be a 'Summer' here too, July & August are the official Summer months.

One of my friends, who has recently shifted to London from India keeps asking me when the weather is going to be nice enough and I keep telling her that it already is very good (temp around 20 deg, cloudy most of the times, windy, sunny & clear once in a while)! A few more days and the cold will start setting in.

Anyway, coming back to the post, whenever it is raining, we crave for something fried. Of course we cant have fried things every time it rains in London, that would sometimes mean 5 days in a week! But we do indulge ourselves sometimes. On one such occasion, we made the very famous Kanda Bhaji (Onion Pakoras/Fritters).

Makes about 12-14 small Bhajis

Ingredients

  • 1 medium sized onion, very thinly sliced
  • Approx 5-6 tblsp Besan (Chickpea flour)
  • 1-2 tsps red chili powder
  • 1/2 tsp Haldi (Turmeric powder)
  • Salt
  • Oil for Frying

Method:

The onion slices should be as thin as possible. separate the slices by hand to get single strands.

Add the besan, red chili powder, haldi and salt & make a batter by adding a little water. Adjust the quantity of besan as you prepare the mix. The batter should barely coat the onion slices. The onion slices should be partially visible once the batter is ready.

It shouldn't happen that the batter is heavy & the slices are only visible here & there, the main item should be the onion slices. The batter should be such that it just holds the slices together.

Heat oil in a kadai. Once heated drop small lumps of the prepared batter and fry till crisp.

Picture 198

Serve with Ketchup or chutney. Can be served as starters or as an accompaniment to a simple Rice meal or had as an evening snack with Tea. Ideal to have when it is raining :)

Sunday 31 August 2008

CLICK: Citrus

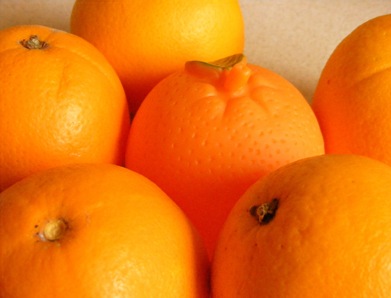
My daughter S, who is all of 15 months now, has a lot of toys. 3 big boxes full actually. So much so that nowadays whoever enters the house is greeted by the 6 teddy bears(different sizes), 3 doggies, 2 elephants, 3 balls, rattles, building blocks, rings, a variety of Fish and so on.

Among these  is a set of artificial fruits made up of non toxic plastic-rubber material which make a sound similar to the auto rickshaw horn, when pressed. These were ideal for S, when she was teething (she still is!), she could chew on them all she wanted :) Out of these fruits banana, apple & orange are very much like the real thing.

But when it comes to playing, S prefers things from the kitchen. Utensils, dabbas (boxes) empty as well filled ones, rice & moong dabbas being her favourite, plates, bowls anything & everything that is in her reach. She doesn't even spare the fruits & vegetables, if she happens to lay her hands on them.

On one such occasion last week, she brought the oranges out from the kitchen into the living room or rather her playground. While we were playing with her, GM accidentally picked up the real orange thinking it to be the fake one and was wondering why it was not making the sound. We had a hearty laugh when we realised what it was.

So the next day I reversed things a bit, instead of S getting things from the kitchen into the living room, I took her toy orange into the kitchen and grouped it with the real oranges and went clicking.

 20Aug08 213

This is my entry for this month's CLICK - Citrus event.

Friday 29 August 2008

Pav Bhaji with home made Pav from Jugalbandi

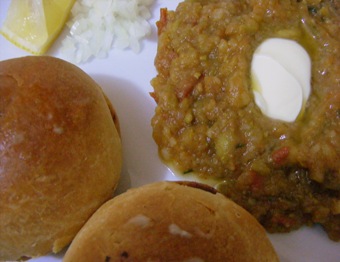
Pav Bhaji is a regular with us for many reasons. First & foremost because we love it so much! Then, the simplicity of the recipe and a feeling of having had something special for lunch/dinner :)

GM makes great tasting Bhaji and I have still not been able to match that although I follow the same recipe and both of us use the same Masala powder! But he is too modest to admit that and prefers that I make the bhaji every time. And no he is not trying to escape the working in kitchen because when we make Pav Bhaji he is the one who chops the vegetables and gets everything ready most of the time :)

So, while we get to eat the almost authentic Bombay restaurant style Bhaji, what we miss, or rather used to miss is the Pav. We get a lot of different breads here, soft buns, burger buns, rolls, baguettes and so many more but not the real Ladi Pav which, if you ask me, is a must for that authentic feel to Pav Bhaji.

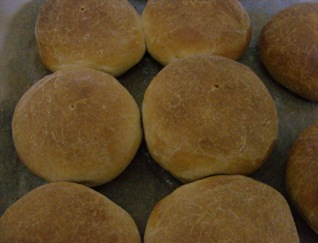
Imagine my reaction when I saw the recipe for these Pav along with a host of information about the same and the very necessary Amul Butter at Jugalbandi! I was happy and apprehensive at the same time. Finally there was a possibility that we could have real Pav with the bhaji now, but I was apprehensive because I had never tried my hand with Yeast baking before, meaning I had never ever made bread at home. But on seeing the easy recipe was totally tempted to try it.

So on Friday, we had Pav Bhaji with the real Pav! But as always I was so excited & in a hurry to try them out that I misinterpreted one step and applied the butter on the surface much earlier than was required, the result being that the outer crust of the Pav turned out to be a little crispier.

Now, Jai & Bee, as always have given the healthier option of using whole wheat, but since I wanted the 'authentic' Pav and was ready to forego the health part, I used Maida (Plain flour) instead.

20Aug08 427

I am sending this to Zlamushka for the Tried & tasted event, where Jugalbandi is the featured blog of the month.

Recipe for the Bhaji

Ingredients

  • 4-5 medium sized Potatoes
  • 1 small Green Capsicum
  • 1/2 cup Green peas
  • 5-6 florets of Cauliflower
  • 1 medium sized onion, finely chopped
  • 3 medium sized tomatoes
  • 2-3 cloves of garlic
  • 2-3 Green chilies
  • 3 tsps Pav Bhaji Masala
  • 1-2 tsp Red Chili Powder
  • 3-4 tsps Fresh Coriander leaves, chopped
  • 2 tblsp butter for the Bhaji and lots more for the Pav
  • Salt
  • Finely chopped onions, lemon slices & fresh coriander

Method:

Boil the potatoes, peel, mash & keep aside.

Boil the other vegetables as well - peas, cauliflower, capsicum in this case. You can use a lot of other vegetables but we prefer to keep it simple and use only the above mentioned, cauliflower also getting axed sometimes. Once they are boiled, mash these too and keep aside.

Grind together the green chilies and the garlic to make a paste.

Heat the butter in a pan and fry the onions. Continue to fry till the onions start turning brown. At this point add the chilies-garlic paste and fry for some more time(abt 3 min). The bhaji gets a lovely colour because of the browning of the onions.

Add in the chopped tomatoes and cook till they are tender.

Add the Pav Bhaji Masala, red chili powder and salt and saute. Once the spices are mixed thoroughly add the mashed potatoes and mix.

Add the other mashed vegetables and mix and cook on medium flame.

If the bhaji is very dry add a little water to thin it out, as little as possible. Adding too much water will spoil the consistency of the bhaji and also affect the restaurant style taste. In fact the bhaji made in restaurants does not have any water at all and the semi solid consistency is obtained by adding huge amounts of butter to the bhaji while mashing it on a large Tawa (Griddle). Since this is practically not possible at home, I add a little bit of water.

Add the chopped coriander leaves and give it a stir and let it heat for another 5 min before turning off the flame.

To serve, slit the Pav into halves and roast them on a griddle with lots of butter. You cant get stingy with the butter here, its a must!

20Aug08 436

Serve the Bhaji with a dollop of butter along with the Pav, chopped onions, lime slices and garnished with coriander leaves.

To make things spicier, mix red chili powder and a little Pav Bhaji masala along with salt and a few drops of lime juice with the chopped onions. Any one who wants it hotter can add the spiced up onions to the Bhaji!

A New look!

My posts will still be the same but of course with different & new recipes and the look of Taste Buds is definitely different! I was in a mood for a change and so my blog gets renovated to this :)

I had a huge helping hand from dear GM, who is the expert here! Right from picking up the snaps & designing the header to deciding the colour scheme, he was there with his suggestions & ideas.

I hope you will enjoy the new look. Please do let me know if you face any problems accessing the blog or if the page is not getting loaded properly. I would also welcome any suggestions that you might have for me to improve the look or functionality of this blog.

Sunday 24 August 2008

Orange & Oat Bars

MBP_Logo

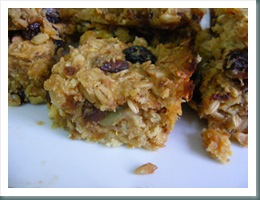
The original name was Orange & Date bars. I found this simple & quick recipe at Sunita's World and liked it immediately. More so because I had these oats with me for a long time which were waiting to be used somewhere, having left the hope of being consumed as it is, long back!

Since I used lesser amount of dates in the recipe I am calling them Orange & Oat Bars. Except for this small change I followed the exact recipe from Sunita.

20Aug08 236

This is my entry for this month's MBP-Fruit Fare, an event started by Coffee (Spice Cafe) and being hosted by Aparna (My Diverse Kitchen) this month.

Friday 22 August 2008

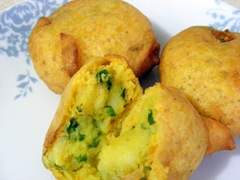
Batata Vada

This is not the first time I made them. Vada Pav is one of the 2 things that we miss the most here. Pani Puri is the other one. Samosa, we manage to get some decent ones. Even Bhel, Sev Puri, papdi chat etc are available in restaurants and at some places they are really nice. But not these two. The Batata (Potato) vadas available in the restaurants are more Aloo Bonda, not at all the same as the Batata wada you get on the streets of Bombay & Pune.

Wada Pav for me, in Bombay is synonymous with the thela (cart) near King George School in Dadar. And for Pune its the Joshi wadewale. You do get them at all the other places but these two are the best in the respective cities for me! Whenever we are in Pune, we actually make the Rickshaw take a route so that he passes one of the Joshi outlet, stop and have some & pack some more to savour later. King George School Wada Pav is a different story altogether. The two years of Junior College were literally spent enjoying these Wada Pavs and Samosas from a store called Nityanand right next to the college. Strategic locations, I say :)

Whenever we are in the mood for Batata Vada, we make them at home. No use searching for good ones outside. So as I was saying this was not the first time I made these. But this time I made a slight change which resulted in the Wadas being almost the same as those available on the streets. I added Eno Fruit salt to the besan (Chickpea flour) batter and the vadas turned out crisp & delicious. For those who don't know, Eno is a very popular antacid brand in India. Baking Soda can be added as a substitute for this. Although I have never liked the idea of adding soda/Eno to the frying batter, I really wanted to try it out once & see the difference. It definitely makes a difference!

Anita's A Mad Tea Party will be celebrating its Birthday & the menu for the party is Batata Vada!

Serves ???(Never mind. The consumption has no connection with the No of People!)

Instead lets just say the following will make about 11-12 medium sized vadas

Ingredients

For the batter:

  • 2 cups besan (Chickpea flour)
  • 1/2 tsp Turmeric powder
  • 1/2 tsp red chili powder
  • salt
  • 1 tsp Eno fruit salt

For the potato stuffing:

  • 5-6 medium sized potatoes, boiled & peeled
  • 5-6 green chilies
  • 3-4 cloves of garlic
  • 1/4 cup chopped fresh Coriander leaves
  • 1/2 tsp Turmeric Powder
  • Salt

Oil for frying

Method:

Mix together all the ingredients for the batter except Eno Fruit salt and make a thick batter using a little water. The Soda/Eno should be added just before you start frying the vadas.

Grind together the green Chilies & Garlic to make a coarse paste. The quantity of the green chilies can be changed according to how hot the chilies are & also based on how spicy you like your vadas.

Mash the potatoes and add the above paste to it. Also add the turmeric powder, salt, finishing off with chopped Coriander leaves and mix everything properly.Shape into medium sized balls and keep aside.

Heat the oil in a kadai. Once the oil is properly heated, add the soda/Eno to the batter and mix properly.

Dip the potato vadas ion the batter to coat them thoroughly and deep fry them on medium high till they crisp & light brown in colour.

Picture 243

The most ideal way to serve these is with Pav and Garlic Chutney but I had neither and we made do with Tomato Ketchup. The vadas tasted great nevertheless.

These vadas are going to Anita's Mad Tea Party for her second Blogversary, Congratulations! I hope she has a kettle of hot tea ready to go with these Batata vadas :)

Tried & Tasted: Jugalbandi

I first came across Jai & Bee's Jugalbandi when I followed a link for the CLICK event from another blog. As I started browsing post after post, I completely got hooked on to the blog. I am not saying recipe after recipe, purposely, because their posts are so much more than just recipes. Theres loads of information, fantastic photographs, new ideas, healthy options and so on. Every food blogger now knows about their Garden 'patch' which, I am assuming, yields most of their kitchen supplies :)

I always refer to Jugalbandi, when I want to make something with a particular veggie but don't know what exactly to do with it. I had tried Brussels Sprout a few days back as per this(favourite style) and liked it very much. That was my first time with the Sprouts.

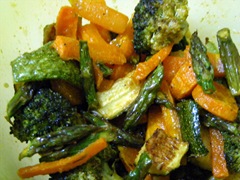
Now I had some Asparagus with me and after having tried it this way, I wanted to do something different with it & browsed their blog and found exactly what I was looking for.  So I went ahead and made their Roasted Asparagus, Carrots and Zucchini with herbs.

I followed the exact recipe but also added Broccoli. I used basil, cilantro and just a little bit of Mint for the fresh herbs.

 20Aug08 225

The veggies came out really well but I think I might have cooked them in the oven for a couple of minutes more than required, will have to be more careful next time.

This is my entry for Tried & Tasted event at Zlamushka's Spicy Kitchen.